

Thursday, December 31, 2099
~Introduction~
Wednesday, December 30, 2099
Intro- Electric vs Nitro cars
When I say "R/C" cars, what comes to mind is probably the crappy ones you can find at Walmart or other retail stores. Those are referred to as "toy-grade" R/C cars. They are usually very cheap ($10-$50), however they aren't too much fun. Their motors are very weak, delivering speeds of around 5 MPH. Their batteries only last 10 minutes before they start to weaken. They are also not customizable and if something breaks, the whole vehicle is garbage. They are good enough for kids to play with, but if you want something more fun, you will want to check out "hobby-grade" R/C cars. These cars are a whole different story. They have very powerful motors, with speeds of 25-60MPH, some even faster. They are a lot of fun to play with, and will leave the "toy-grade" ones in the dust.
Hobby grade R/C cars are divided into two main categories: Electric-powered and Nitro-powered. Each has its own advantages and disadvantages:
Electric-powered cars are simpler. All you need is a battery to run it. They are also quieter. You can easily run it around in your house without anyone caring too much. Also, electric ones are usually a little cheaper.
Nitro-powered cars are what I will be discussing next. Even though they are a little more expensive, they are a lot more fun. They have more power than their electric counterparts. They are also able to be run all day long, whereas an electric one has to stop to recharge the batteries. Nitro ones are also a bit louder, but as long as you don't run it at night or early morning when your neighbors would care it will be fine.
Even though electric cars are cool too, this blog will focus mainly on nitro ones.
Hobby grade R/C cars are divided into two main categories: Electric-powered and Nitro-powered. Each has its own advantages and disadvantages:
Electric-powered cars are simpler. All you need is a battery to run it. They are also quieter. You can easily run it around in your house without anyone caring too much. Also, electric ones are usually a little cheaper.
Nitro-powered cars are what I will be discussing next. Even though they are a little more expensive, they are a lot more fun. They have more power than their electric counterparts. They are also able to be run all day long, whereas an electric one has to stop to recharge the batteries. Nitro ones are also a bit louder, but as long as you don't run it at night or early morning when your neighbors would care it will be fine.
| electric-powered street car |
| nitro-powered monster truck |
Even though electric cars are cool too, this blog will focus mainly on nitro ones.
Tuesday, December 29, 2099
Intro- types of vehicles
There are 3 main types of vehicles for a nitro R/C car. There are on-road street cars, off-road buggies, and off-road monster trucks. The on-road street cars are very low to the ground, with little ground clearance. Their tires are smooth, and they are usually faster than the off-road types. They are only good for flat surfaces such as smooth roads or race tracks. They will not work in an off-road environment such as grass or dirt that is not perfectly flat. They also usually have 2WD.
| nitro on-road street car |
The next vehicle type is the off-road buggy. They have 1-2 inches of ground clearance, and still go very fast. Their shocks are larger to absorb the bumps and impacts of driving off-road. Their tires have bumps for traction. They usually have 4WD, so they can go over many obstacles and steep inclines, on almost any terrain. These are a very good type of vehicle, because you can drive it off-road, as well as race on-road since they still can achieve speeds of 25-50 MPH.
| nitro off-road buggy |
The third type of nitro R/C vehicle is the off-road monster truck. They are similar to the buggy, except bigger. The ground clearance is usually 3-6 inches, meaning it can go over larger obstacles. The tires are larger, so it has better traction. Usually it has more power than the buggy, however they go slower. Since they are higher off the ground, they aren't usually ideal to be racing, but it is possible.
| nitro off-road monster truck |
So if you are looking to purchase your fist nitro R/C car, I would recommend to get a vehicle that best suits your environment. If you live in a very flat area where there are a lot of roads, or you will be racing a lot, go with a street car. If you want to drive it around your backyard and around the neighborhood, go with a buggy. And if you want to go over some serious terrain, you will want a monster truck.
Monday, December 28, 2099
How a nitro engine works
You may be interested in purchasing a nitro R/C car, but you may want to know how it works first. This post will explain how.
First off, with the purchase of a nitro R/C car, you will receive a 2.4GHz transmitter. It comes in the "pistol-style" format, with a throttle/brake lever, a steering control, and some other small dials that aren't important right now. The transmitters usually take 4 or 8 AA batteries. Once you get that hooked up, it will send a signal to the receiver on the car itself. The receivers usually take 4 AA batteries, and it tells the car what to do based on what you do with the transmitter.
Once the receiver gets the signal from the transmitter, there are 2 basic motions that are controlled: steering and throttle/brakes. The steering is controlled by a servo, and the throttle/brakes are controlled by another servo. When you turn the steering wheel on the transmitter, it tells the servo on the car to turn which turns the wheels. Unlike a "toy-grade" car, it is not a 3 position system (100% left, center, or 100% right", but it can turn at any angle in between, based on how far you turn the wheel on the transmitter. Just like a real car.
Now for the throttle/brakes, it is somewhat similar. When you pull the throttle lever on the transmitter, its signals the throttle servo to turn, which opens up the throttle. When you push the lever out, it engages the brakes. Most cars (at least off-road) have 4 disc brakes, which do a VERY good job of stopping the vehicle, even at high speeds, in just a foot or two, depending on the surface type.
Now for how the engine runs. You start out by putting some Nitromethane into the fuel tank, and priming the engine (I will go into detail of the starting process later on). Next you put the "glow plug igniter" onto the glow plug, and pull on the pull starter. A "glow plug" is just like a spark plug in a car, but instead of sparking every time, it is heated up once with the igniter to get the engine going, and compression keeps it running after that. Anyways, once the engine is running, you can control it with the transmitter. When you apply the throttle, it opens up the carburetor, which is a device that mixes the air and fuel together. The wider the carb is opened, the more fuel and air that can get in, which makes the engine run faster, making the car go faster. When the brakes are applied, the carb is closed almost all the way, and the brakes are then engaged, slowing the car down.
The engine is hooked up to the crankshaft, which rotates all 4 tires when the throttle is applied. The tires have very high-torque for the car's small size, which makes them go very fast, with really snappy acceleration. The carburetor has some adjustments that have to be adjusted. They are called the "high, low, and idle speed needles". I will go into further details about them later, but the high speed adjusts the air/fuel ratio at high RPMs, the low speed adjusts the ratio at low RPMs, and the idle needle adjusts the engine speed while it is at idle.
First off, with the purchase of a nitro R/C car, you will receive a 2.4GHz transmitter. It comes in the "pistol-style" format, with a throttle/brake lever, a steering control, and some other small dials that aren't important right now. The transmitters usually take 4 or 8 AA batteries. Once you get that hooked up, it will send a signal to the receiver on the car itself. The receivers usually take 4 AA batteries, and it tells the car what to do based on what you do with the transmitter.
 |
| Typical R/C transmitter |
 |
| Steering servo |
Now for the throttle/brakes, it is somewhat similar. When you pull the throttle lever on the transmitter, its signals the throttle servo to turn, which opens up the throttle. When you push the lever out, it engages the brakes. Most cars (at least off-road) have 4 disc brakes, which do a VERY good job of stopping the vehicle, even at high speeds, in just a foot or two, depending on the surface type.
 |
| Throttle/brake servo |
Now for how the engine runs. You start out by putting some Nitromethane into the fuel tank, and priming the engine (I will go into detail of the starting process later on). Next you put the "glow plug igniter" onto the glow plug, and pull on the pull starter. A "glow plug" is just like a spark plug in a car, but instead of sparking every time, it is heated up once with the igniter to get the engine going, and compression keeps it running after that. Anyways, once the engine is running, you can control it with the transmitter. When you apply the throttle, it opens up the carburetor, which is a device that mixes the air and fuel together. The wider the carb is opened, the more fuel and air that can get in, which makes the engine run faster, making the car go faster. When the brakes are applied, the carb is closed almost all the way, and the brakes are then engaged, slowing the car down.
 |
| Fuel tank |
 |
| Nice little diagram of the nitro engine setup |
The engine is hooked up to the crankshaft, which rotates all 4 tires when the throttle is applied. The tires have very high-torque for the car's small size, which makes them go very fast, with really snappy acceleration. The carburetor has some adjustments that have to be adjusted. They are called the "high, low, and idle speed needles". I will go into further details about them later, but the high speed adjusts the air/fuel ratio at high RPMs, the low speed adjusts the ratio at low RPMs, and the idle needle adjusts the engine speed while it is at idle.
Sunday, December 27, 2099
What you need to get started
So if you have read this far and still are interested, I will explain what you will need to get and do to get started in this hobby. Everything that you need are as follows:
-Actual nitro R/C car (you can order them online, but if you live near a hobby shop, I recommend going to that first)
-Nitro "starter kit" (contains basic tools and things you have to have for the car)
-Nitromethane fuel (same thing, easily bought online or in hobby shop)
-After run oil (used in the engine after its been run to keep it lubricated and running strong)
-Spare glow plugs (in case the one you have burns out, it needs to be replaced)
-AA batteries (usually 8 or 12)
The actual nitro car usually comes with: the car, transmitter, 1 glow plug, and a manual and sometimes some other small miscellaneous parts such as stickers. (usually $120-$300+)
The starter kit usually comes with: 2 cross wrenches that fit every bolt and nut, as well at the glow plug on the car, the glow plug igniter, a charger for the igniter, a fuel bottle to get the fuel into the tank, and 2 screwdrivers, one flat-head and one phillips head. (usually $15-$25)
The nitro fuel has a whole bunch of different prices, based on where you get it from and how much you get. Online, I paid $35 for a gallon (I will include links), but if you get a quart, it can be about $25 so i recommend buying in gallons so you get the best deal. I'm not sure how much hobby shops charge, but I imagine it will be cheaper online.
After run oil is cheap, I got a 2oz bottle for like $5 off eBay.
Spare glow plugs are also cheap, I got one for about $6 off eBay.
Okay now for some recommended sites....
To get the car, I really recommend NitroRCX. They have a pretty decent array of nitro, as well as electric cars. They also sell R/C boats. But what really makes them stand out to me is how they have the best prices around. I got the 1/10 scale Exceed RC Hyperspeed buggy, it cost $120, which is very cheap for a nitro car. Despite the cheap prices, this car is very durable and very fast. NitroRCX also has free shipping, if you put the coupon code "rcxfreeship" into the box. (the code may not work forever, but it works as of right now)
For the starter kit, if you buy from NitroRCX, it will automatically include one with your purchase for $15. This is the best price I have found for a starter kit.
| starter kit |
I got my nitro fuel from Torco Nitro, as they have good prices, and free shipping. Nitro comes in %, determining how much oil is in the mixture. For the buggy I got, it uses 20%. Street racing cars use a lower number I think, but the website you get from will tell you which to use.
 |
| 20% nitromethane from torco |
After run oil is pretty much all the same. Glow plugs come in different heat ratings, Hot, med, and cold. For an off road buggy, use a Med or preferably a hot one. For on road racing, its usually a cold one that is used.
 |
| This is the after run oil i use. |
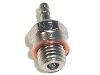 |
| Here is a glow plug. The copper washer is important. |
Thats basically all you need to get started. I bought everything i needed for about $180. Which is actually a good price for all I got.
Saturday, December 26, 2099
Starting your nitro car for the first time
Okay, now if you are interested enough to buy one of these, I will explain what you need to do when you first get the car. The first thing you need to do is open up the starter kit, and charge up the glow plug igniter. You need to charge it for at least 8 hours or so the first time. Without it, you will not be able to even start the car. Once that is on charge, take out the glow plug from the engine and add 2-3 drops of after run oil into the piston. Pull on the pull starter cord a few times to get the oil all over the engine. This puts an initial film of lubrication into the engine so it will not wear out quickly when you go to start it. Replace the glow plug now. The next thing you have to do is go over the entire car and tighten any screws that happen to be loose. Not too tight, just snug. Only tighten the screws that hold stuff together, not the needle adjustment screws on the carb.
Next you can put batteries into the transmitter and receiver. There will most likely be a door you have to unscrew on the car to get to the battery pack. Once the batteries are in, first turn on the transmitter, then the receiver. If you ever turn on the receiver on the car first, it won't have a signal from the transmitter to follow, and may go out of control. The two units should already be synced from the factory, but if they are not, there will be instructions on how to sync them. Usually you just have to press a button.
The next thing you can do is program the failsafe, if there is one. I know the buggy I ordered has it, but I'm not sure about any other ones. If it has a failsafe, start by pressing the "F/S set" button on the receiver, while doing nothing with the transmitter. Now, while the LED is flashing, engage the brakes all the way with the remote. Then push the button again. What this does is if the car goes out of range, or if the battery power drops too low, it will automatically put the brakes on so your car doesn't go flying down the street and smash into anything in its way.
Once the glow igniter is all charged up, you are ready to start your car for the first time. Begin by going outside, and pouring some fuel into the starter kit's fuel bottle. Fill up the fuel tank with nitro, and make sure all fuel lines are connected to their ports. Now you have to prime the engine. This is simple, just put your finger over the exhaust port and pull the chord a few times until you see the fuel go through the line and into the carb. Once the fuel reaches the carb, stop or you will flood the engine. You also need to oil the air filter. Simply pull the whole thing off the car, and pull the foam pieces out of their rubber housing.
Then take some basic vegetable oil found in your kitchen, and put a few drops on the foams and rub it in to spread it around. Don't make it dripping wet, but make sure it is oily. The oil particles trap dirt and dust from reaching the engine, which will break it if they enter.
Now that it is primed, its ready to run. Clip the igniter onto the glow plug and pull on the cord. Make sure you do short, quick pulls, as the chord isn't very long. The first time you start it, chances are it will not stay running. I will explain how to tune it to run in the next post. Also, for the first 3-5 tanks of fuel, you can not run it like you want to. You have to "break it in", which makes the engine last longer. That will also be explained in the upcoming post(s).
Next you can put batteries into the transmitter and receiver. There will most likely be a door you have to unscrew on the car to get to the battery pack. Once the batteries are in, first turn on the transmitter, then the receiver. If you ever turn on the receiver on the car first, it won't have a signal from the transmitter to follow, and may go out of control. The two units should already be synced from the factory, but if they are not, there will be instructions on how to sync them. Usually you just have to press a button.
The next thing you can do is program the failsafe, if there is one. I know the buggy I ordered has it, but I'm not sure about any other ones. If it has a failsafe, start by pressing the "F/S set" button on the receiver, while doing nothing with the transmitter. Now, while the LED is flashing, engage the brakes all the way with the remote. Then push the button again. What this does is if the car goes out of range, or if the battery power drops too low, it will automatically put the brakes on so your car doesn't go flying down the street and smash into anything in its way.
| 2.4 GHz receiver with failsafe |
Once the glow igniter is all charged up, you are ready to start your car for the first time. Begin by going outside, and pouring some fuel into the starter kit's fuel bottle. Fill up the fuel tank with nitro, and make sure all fuel lines are connected to their ports. Now you have to prime the engine. This is simple, just put your finger over the exhaust port and pull the chord a few times until you see the fuel go through the line and into the carb. Once the fuel reaches the carb, stop or you will flood the engine. You also need to oil the air filter. Simply pull the whole thing off the car, and pull the foam pieces out of their rubber housing.
Then take some basic vegetable oil found in your kitchen, and put a few drops on the foams and rub it in to spread it around. Don't make it dripping wet, but make sure it is oily. The oil particles trap dirt and dust from reaching the engine, which will break it if they enter.
Now that it is primed, its ready to run. Clip the igniter onto the glow plug and pull on the cord. Make sure you do short, quick pulls, as the chord isn't very long. The first time you start it, chances are it will not stay running. I will explain how to tune it to run in the next post. Also, for the first 3-5 tanks of fuel, you can not run it like you want to. You have to "break it in", which makes the engine last longer. That will also be explained in the upcoming post(s).
Friday, December 25, 2099
Tuning the needles to keep the car running


Here you can see the low speed needle screw. It is the one in the middle of the rubber just under the bar on the top. For factory settings, it is recommended to turn the high and low speed needles all the way in (until they dont turn easily anymore) and then turn them 2 and a half turns counterclockwise. Keep them at this for breaking in.
Troubleshooting:
- Engine turns on, but the wheels go automatically and the car won't stay still
- This is because the idle is set too high. To fix, turn the idle to the left a little and try again. You can also try turning the "throttle trim" dial on the transmitter to close the gap a little.
- Engine turns on, but turns off quickly
- This is because the idle is set too low. Do the opposite of what you did to fix the first problem.
- Engine won't start
- There are a number of things that could be the problem for this. First check to see if the glow plug is glowing. Remove it from the car and while holding it on the sides, push it into the igniter. If it glows orange, than its good. If it doesn't glow or is very weak, check to see if the igniter is charged, then replace the glow plug itself if that doesn't work. Also, make sure there is fuel in the lines, and make sure the idle isn't too low.
- Engine cuts out when brakes are applied
- Usually if this happens, you need to adjust either the idle or low speed needle.
Thursday, December 24, 2099
Breaking in a new engine
Before you run the car as you probably want to, it is VERY VERY VERY important that you break in the engine. You can compare this to breaking in a new pair of shoes. When you first get them, they are very stiff and if you wear them for a while they may hurt your feet. As you wear them longer and longer, they soften up and fit better.
Breaking in a nitro car is similar. Basically all you do is run the car at low speeds for a few tanks of gas. If you don't break it in properly, the piston and the sleeve will not fit each other very well and it will break the car very quickly.
FIRST TANK: For the first tank of gas, simply let the engine idle. Don't touch the accelerator. Just leave it alone and let it run all its gas out.
SECOND: For the second tank, put the car on a flat, hard surface such as a road, and run it around at low speeds. Don't pull the throttle more than 25% of the way, and don't keep it held down. Pump it every couple of seconds to keep the car going.
THIRD: For the third, do the same as the second, but don't go more than 50% of full throttle.
FOURTH: The fourth tank, don't go over 75% throttle.
FIFTH: And for the fifth tank, you can begin to go at full throttle, just do not keep it held at full throttle for more than 2 seconds. This puts too much stress on the engine, which has to heat up to make the metals mold to the right size. After the 5th tank, you can gradually increase how hard you run the engine. Soon enough you can do it however you want, through grass, off jumps, ect.
Wednesday, December 23, 2099
After-run maintenence
After you finish running, after each day, you have to do all of the following to help keep your nitro car running the best it can:
- Attempt to run the engine until all the extra fuel is burned up. Nitro has alcohol in it, which attracts water which will rust the engine. Make sure the fuel tank is empty. You can use the fuel bottle to remove any excess.
- Remove the glow plug and insert 2-3 drops of after run oil, and pull the cord to turn over the engine to spread the oil. You can also remove the air filter and insert 2 drops into the carb as well.
- Put the piston in BDC (bottom dead center) position. The sleeve is tapered, so you have to put the piston at the bottom position to let it cool properly. To do this, remove the glow plug, and put a soft object such as a Q-tip into the opening. Pull on the pull cord and stop when the piston is as low as it will go. Once it is there, make a mark on the flywheel with a marker so you will know where to put it next time.
- Take off the wheels, spoiler if there is one, and body and wash them in the sink with water. The dirt will easily come off. Set them aside to dry. Also you want to wash out the air filters, with water and soap, and rinse the fuel bottle out.
- Now you have to clean the actual car. Don't use water. It will break the electrics. I like to use an air compressor because it easily blasts everything away and leaves the car clean. If you don't have one, you need to use a paper towel and a toothbrush. You can also use WD-40 as it is safe for electronics.
- Remember: transmitter always goes on first, and off last.
And that's it! Remember to do this after every day of running.
Sunday, December 20, 2099
Things to remember
Now that I have taught you most of what you need to know, I will tell you some things you need to remember and be cautious of.
- Only use the correct % of nitro that your car is made for. Otherwise, it will mess something up.
- Remember to perform the after-run maintenance after every run.
- Be sure to remember to break-in the engine before you use it to its full potential.
- Transmitter on first, off last.
- While driving, be sure you are in control. If you think you might crash, slow down or go to a more open area.
- Always check to make sure the steering/brakes are working before you run it.
- Don't inhale the fumes of the nitro (it BURNS) and avoid skin/eye contact. Especially eye contact.
- Have fun.
Saturday, December 19, 2099
Optional upgrades
Even though the basic nitro car is awesome, you can add some things to make it even better!
The first thing you can do is swap out some of the plastic parts for more durable aluminum. It costs a bit more, but it keeps the car from breaking in some spots if you wreck bad. I'm not sure about other companies, but the NitroRCX website sells tons of aluminum upgrades. They are totally optional and the car will be perfectly fine if you don't want them
The next thing you can do is waterproof it. If you drive an unmodified RC car through the water, the servos could get damaged, and they cost $25 each. To combat this problem, simply put large balloons around the servos, and zip tie the opening shut. I am not going into detail about the process, but if you SEARCH it, you will find how to do it in detail. I highly recommend doing this even if you don't plan to drive through water directly.
Another thing you can do is add LED lights to the car. A good website that sells lights specifically for RC cars is RCLightHouse. You can add headlights and brake lights, ect. The buggies don't really have good spots for lights, but cars and trucks do. The lights make it look awesome at night.
Subscribe to:
Posts (Atom)